Fujifilm X-S10: first impressions
I treated myself with the Fujifilm X-S10 and I’m loving it
I’ve been using the compact point-and-shoot Panasonic Lumix DMC-LX10 as my main camera of choice for the past few years. Make no mistake, it captures very high-quality pictures taking into account its 1-inch sensor size. My old DSLR, the Canon EOS 40D, still works fairly well, but it’s starting to show its age: The trigger button is hit-or-miss—even after cleaning it thoroughly with isopropyl alcohol, the camera no longer establishes a connection to a PC via USB and downloading the images is quite cumbersome as I need a special card reader for Compact Flash memory cards. Both are ancient technology by today’s standards.
So I decided to treat myself with an early Christmas present and got a mirrorless Fujifilm X-S10 with the Fujinon XC 15-45mm f/3.5-5.6 OIS PZ lens and the Viltrox EF-FX1 adatper, which just came in the mail yesterday afternoon. In this post I’m documenting my very first impressions with the camera and the accessories.
X-S10
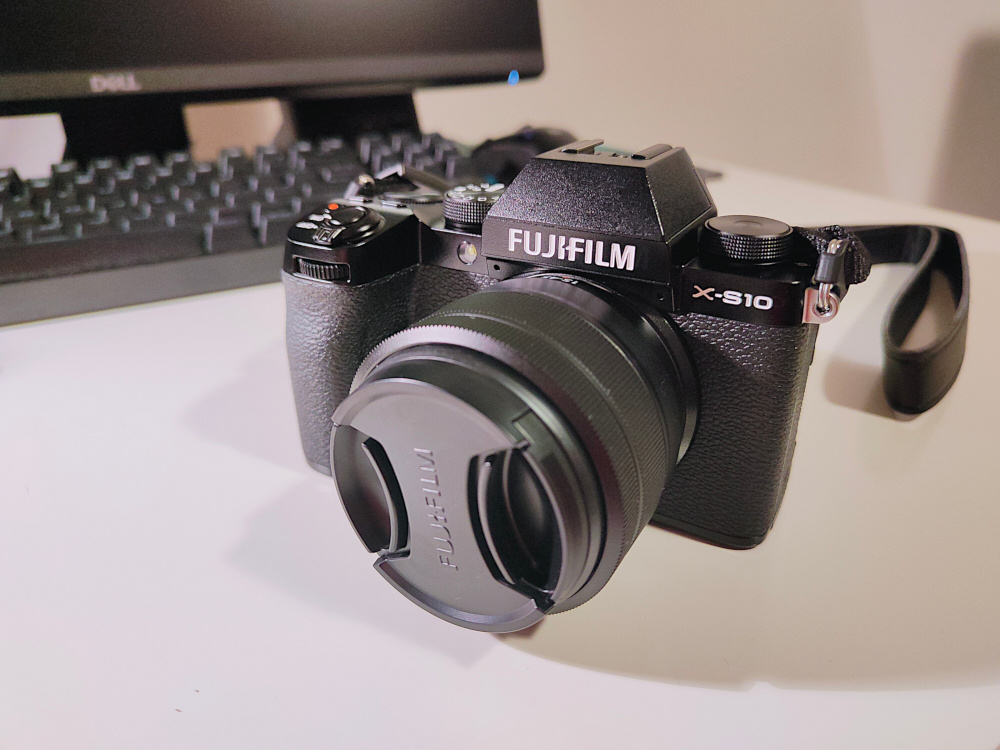
First, the camera looks stunning.

The Fujifilm X-S10 with the Fujinon XC 15-45mm lens.
It does not look as gorgeous as other Fuji models like the X-T4, but it’s still a looker. It is very compact and feels quite sturdy. Surprisingly, it is not weather-sealed, but by just holding it into your hands you would think it is.
The body
This is the first mirrorless camera I hold for more than 5 minutes, and compared to my Canon EOS 40D, which is much larger and heavier, it feels small. I guess it will take some time to get used to the new feel, but I love the small package and compact form factor. Just by holding it you know it is very well built. The button disposition is okay. I’m not used to it yet, and I miss the little back quick control dial on my 40D, but I gain a touchscreen.
Connectivity
It has a 3.5 mm mic input jack and it charges through a USB-C port. This is a welcome feature compared to the Micro-USB in the LX10 or the Mini-USB in the 40D. The camera also supports Bluetooth and WiFi to transfer images wirelessly. I still haven’t checked whether they implement open protocols or a proprietary app is needed to transfer the files. I fear the second option is the correct one though.
Shooting
As for the image quality, I can’t really say anything. I haven’t downloaded or looked at any images yet, and the very few I took, were taken in a rather low-light environment. I got this camera partly due to its IBIS (in-body image stabilization), and I could at least notice that it works really well. I could hand-held shots at 1/4 and they still came out sharp as far as I could see in the little display.
Display
Another important thing that made me decide for this little guy is the fully-articulated display. The display can be unfolded to the right and rotated up and down. It can also be folded back in with the screen facing the body to avoid scratches. This should allow for some weird shooting angles.
Viltrox EF-FX1 lens adapter
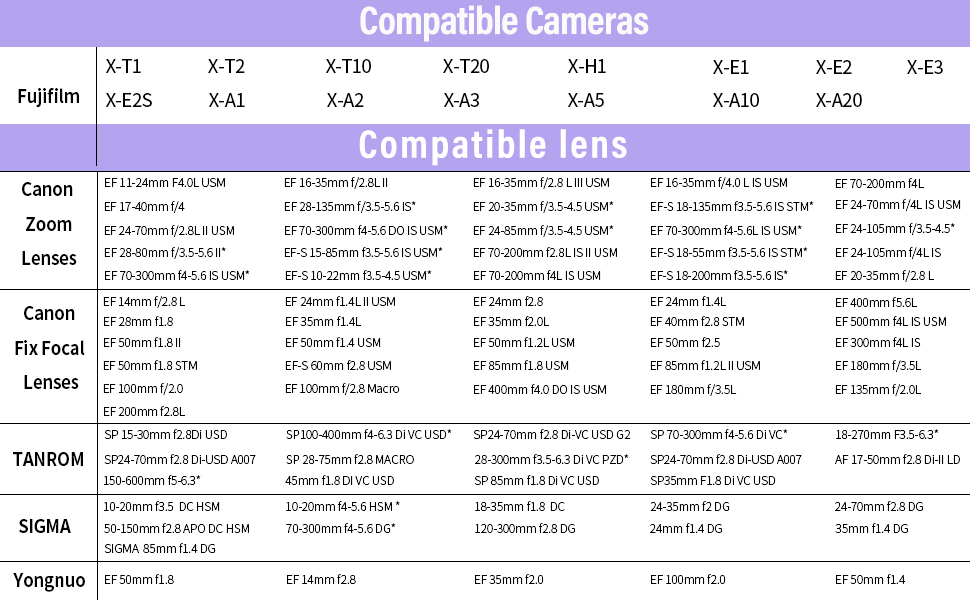
I got this adapter in hopes of using my Canon lenses with the new Fuji body. I could test it with my three lenses:
- The Canon EF 50mm f/1.8 II could automatically get a focus most of the times. The focus wasn’t always on-point though. However, this was done in a very dim living room, so I guess once I take it outside the focusing speed will be better. This lens is in the official compatibility list for the adapter.
- The Sigma EF-S 10-20mm f/3.5 EX DC HSM also seemed to work, but the focus was off most of the times. More tests with better light incoming. This is the only EF-S lens in the set, so it only works with cropped sensors (APS-C). It is also on the official compatibility list.
- The Canon EF 28-105mm USM II did not seem to be able to autofocus at all. This lens is, however, not on the compatibility list, so I didn’t expect for it to just work. Maybe a new firmware update will add support, but I’m not very optimistic. The lens was introduced more than 20 years ago, after all.

Lens compatibility list for the Viltrox EF-FX1 adapter.
Firmware updates
Right after opening the package, I updated the firmware of the body, the lens and the adapter and the process was rather seamless for all of them.
The body and the lens require a formatted SD card, where the FWUP****.DAT file needs to be copied. Then, you need to slide the card into the camera and turn it on by holding the DISP/BACK button. From here on, just follow the instructions on the screen.
The Viltrox adapter is somewhat easier to update. When you connect it to a PC (yes, the adapter has a Micro-USB port) it is mounted as a volume. Then, the firmware update process starts automatically, the drive is unmounted and then it is mounted again. At this point the firmware update was successful.
Conclusion
These are my short first impressions. I could only play around with the camera for a little over an hour, and that is definitely not much. Hopefully I submit a proper review some time in the future when I’ve had the chance to actually use it.